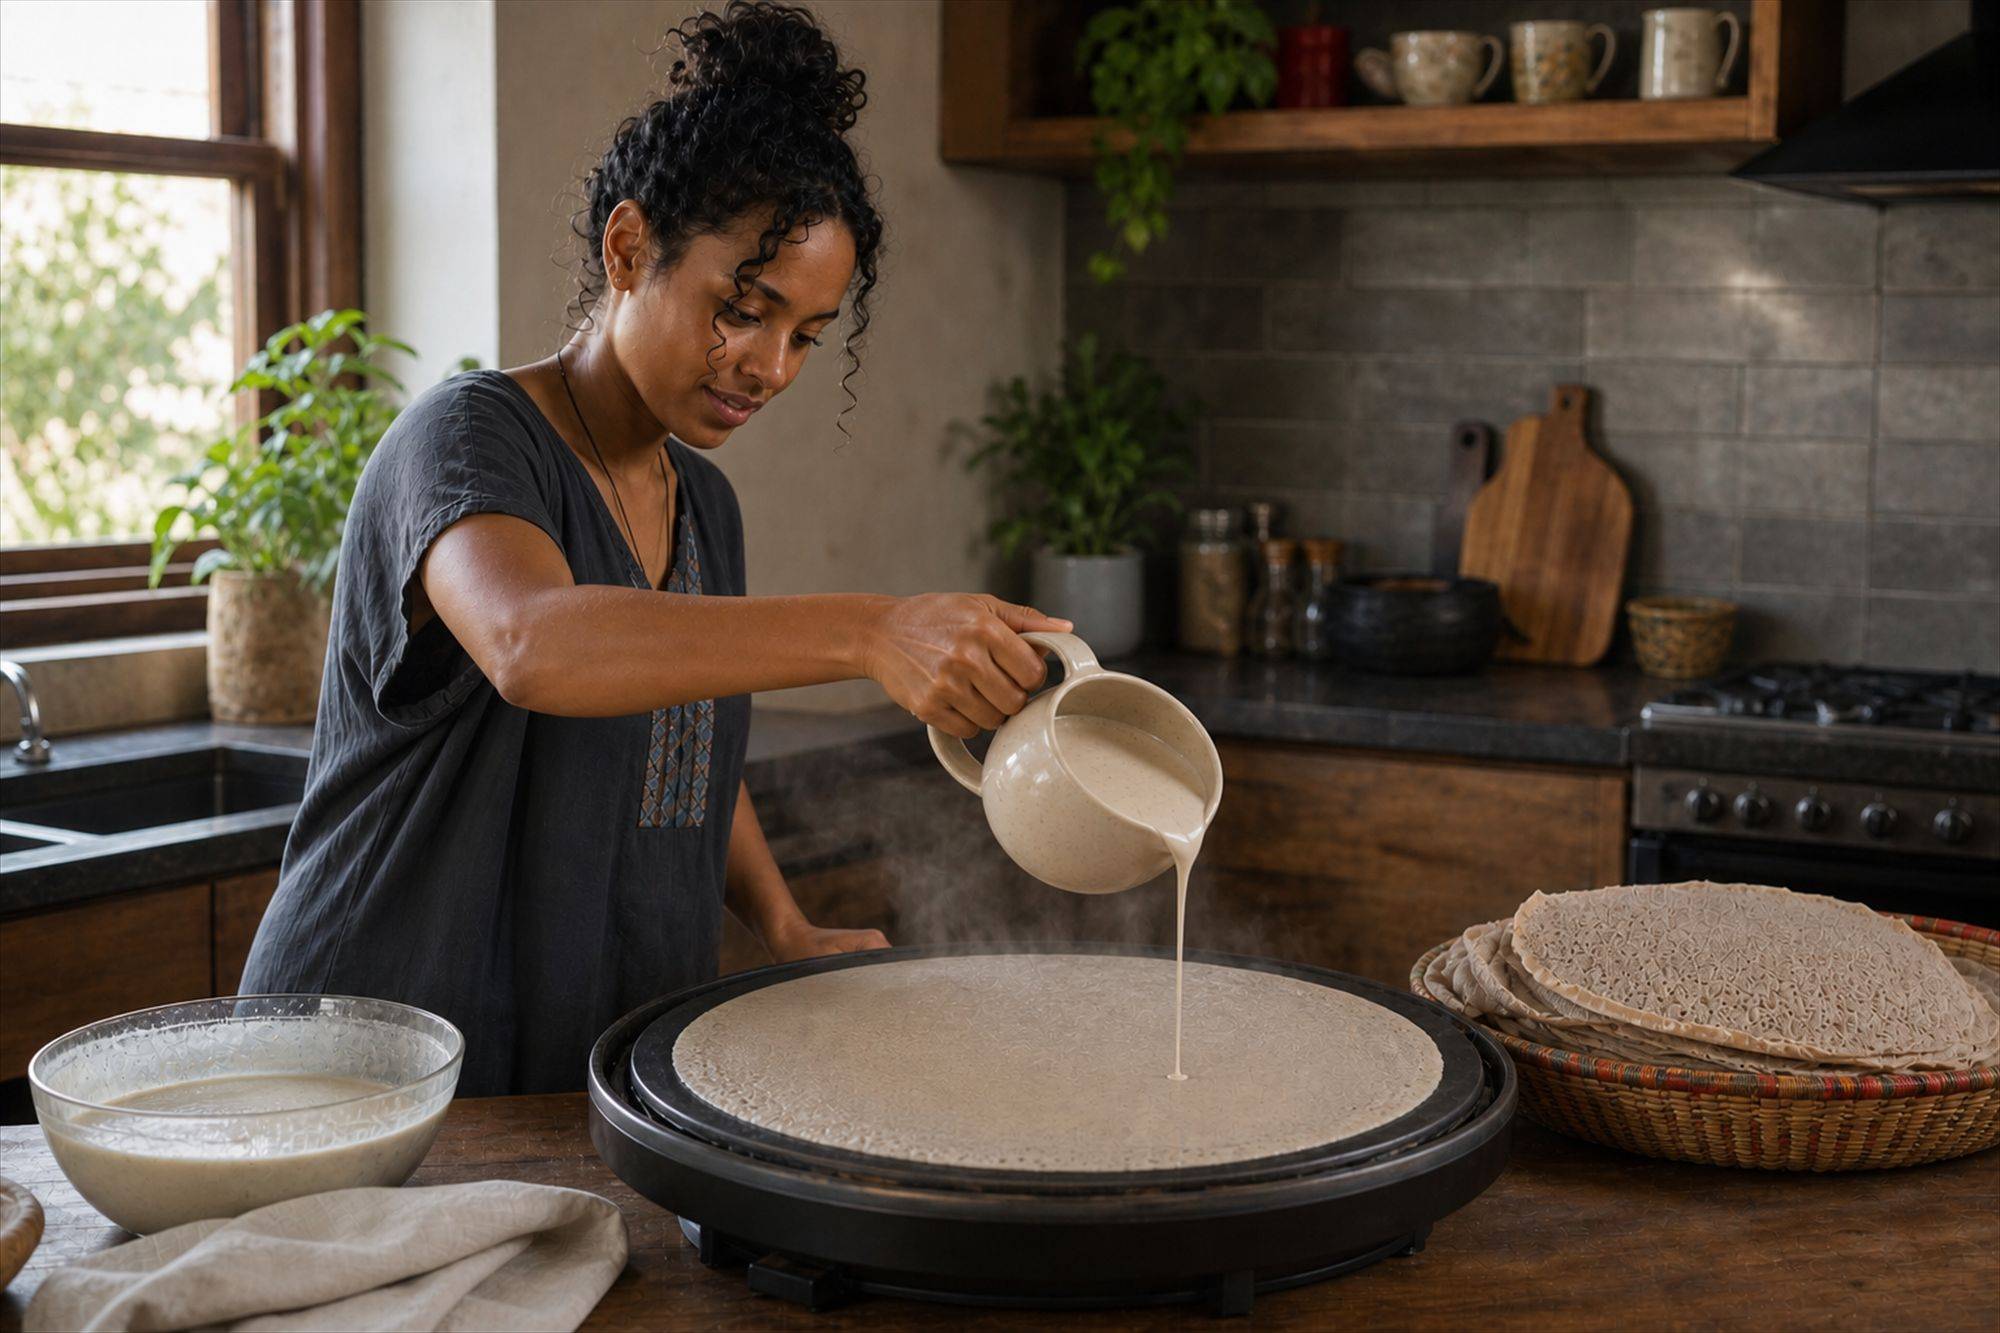
 A steady pour forms the ring before the batter cooks toward the centre.
Injera looks simple, just a soft, spongy flatbread, but it is a fermented bread, and fermentation takes patience and a bit of trial and error. Your first batch may not be perfect, and that is normal. This walks through how it works so you know what you are aiming for at each step, on top of what the beginner’s guide to Ethiopian food already covers about injera’s role at the table.
A note before you start: injera made from teff and the fermentation process vary by household and region, and exact ratios and timings differ. Treat the numbers here as the author’s tested values, and expect to adjust to your flour, climate, and pan.
What you need
- Teff flour. Traditional injera uses teff, a tiny Ethiopian grain, which gives the bread its color and character. Teff itself is naturally gluten free, so a batter made purely from teff is a genuinely gluten free injera. Some home cooks blend in other flours for texture or cost, and those blends behave differently from a pure batter and are not gluten free if the blend includes wheat.
- Water.
- A starter or previous batter (ersho). The liquid that rises to the top of a fermenting batter, called ersho, is often kept and used to kickstart the next batch.
- A wide, flat cooking surface. Traditionally a large clay griddle called a mitad. At home, a large nonstick pan with a lid works as a substitute.
A standard home batch runs about 1 part teff flour to 1.3 to 1.5 parts water by volume: 3 cups of flour to roughly 4 cups of water is a reasonable place to start. Use filtered or distilled water rather than tap. Chlorinated tap water can slow or kill the wild yeast the whole process depends on.
The method, step by step
1. Mix the batter. Combine the teff flour with filtered water at room temperature in that roughly 1:1.3 to 1:1.5 ratio, to a smooth, pourable batter, thinner than pancake batter.
2. Ferment. Cover the bowl loosely, a clean cloth or a loose lid, so gas can escape, and set it somewhere dark and free of drafts: an unheated oven with the light left on, or the top of the fridge, both work. Aim for a room temperature around 21 to 25°C (70 to 78°F). A first batch, fermenting wild with no starter, usually takes 3 to 4 days. Once you have made injera before, saving a few tablespoons of ersho, the fermented liquid or a bit of active batter from that batch, and stirring it into the next one cuts the wait to about 1 to 2 days.
3. Adjust before cooking. By around day three, a layer of yellowish liquid separates to the top. Pour that off and discard it: it carries the bitter byproducts of fermentation, not the flavor you want. Do not skip the next part if you want the characteristic holes, called ayen in Amharic. Take about half a cup of the thick fermented batter and whisk it into a cup of boiling water, stirring over heat until it thickens to a glossy consistency, like a porridge. This thickened starter is the absit. Let it cool fully to room temperature (mixing it in hot kills the yeast), stir it back into the main batter, and let the whole thing rest another 12 to 24 hours until it is bubbling again.
4. Cook. The pan or mitad needs to be genuinely hot, around 175 to 190°C (350 to 375°F); on a stovetop nonstick pan, that is medium high heat. A drop of water flicked onto the surface should dance and evaporate almost immediately. Pour the batter in a thin spiral from the outside inward, then cover with a lid as soon as bubbles start forming and the batter begins to set. Let it steam, covered, for another minute and a half to two minutes, until the top is fully cooked, dry, and matte, and the edges start to curl. A whole injera takes roughly 2 to 3 minutes cooked this way. Never flip it: injera cooks entirely from the bottom heat and the steam trapped under the lid.
5. Cool on cloth, not a stack. Lift each injera onto a cloth or rack and let it cool before stacking, so it does not go soggy.
How to tell it worked
Good injera is soft and foldable, pleasantly sour, and covered in small even holes on the top surface. If it is dense with no holes, the ferment or the heat was off. If it tears easily, the batter or timing needs adjusting. These are normal things to tune over a few batches.
Troubleshooting
Even with the ratios and timings above, a batch can still come out wrong the first few times. Here is what the usual problems point to:
- Flat, dense, no holes. This almost always means the batter did not ferment long enough, or the absit step was skipped or added too hot and killed the yeast. Give the next batch more time before cooking, and let the absit cool fully to room temperature before mixing it back in.
- Barely sour, tastes flat. The same underfermentation issue, just less severe. A longer rest, or a stronger starter of saved ersho, pushes the sourness further.
- Sticks to the pan instead of lifting cleanly. The pan usually was not hot enough when the batter went in, or it needs a very light wipe of oil before the first injera of the session, even on a nonstick surface. A properly hot pan and a thin, even batter layer are what let it release on their own.
- Tears when you try to lift it. This is often a batter that is slightly too thin, or an injera lifted before it finished steaming. Give it the full covered steaming time and check that the top is fully matte and dry, not glossy, before you try to remove it.
- Holes are uneven or only in patches. Usually means the batter was not poured in one continuous spiral, or the pan had hot and cool spots. Pour steadily from the outside in without stopping, and check that your burner heats the pan evenly.
- Too thick and more like a pancake than a flatbread. The batter itself is too thick. Thin it slightly with a little more water next time, since it should pour easily, closer to a heavy cream than a batter you would spread with a spoon.
Storing and reheating
Injera keeps for a few days at room temperature, wrapped or covered so it does not dry out, and longer in the refrigerator, though the texture firms up when cold. To bring a piece back to something close to fresh, warm it briefly, covered, in a pan over low heat or in short bursts in a microwave under a damp cloth, just enough to soften it again without drying out the edges. Injera also freezes reasonably well between layers of parchment or wax paper, which is a practical way to keep extra batter’s worth of bread ready for a quick meal later, though fresh is always better if you have the choice.
Working with a blended flour
A pure teff batter is the traditional, fully gluten free version, but some home cooks blend in a portion of another flour, commonly rice, sorghum, or wheat, for cost or texture reasons. A blend behaves differently from pure teff: it usually ferments a little faster, holds together more easily, and can taste noticeably milder. If you are cooking for someone with a gluten sensitivity, treat any blend containing wheat as not gluten free, and check the label of any pre-mixed injera flour rather than assuming it is pure teff.
Common mistakes
- Rushing the ferment. The sour flavor and the holes both come from time. Batter that has not fermented long enough makes flat, bland injera.
- A pan that is not hot enough, which gives you no holes and a stuck bread.
- Flipping it. Injera cooks on one side, covered.
- Stacking it hot, which traps steam and makes it gummy.
- Expecting batch one to be perfect. It rarely is. Adjust and try again.
Bottom line
Injera is a patience recipe. Get a smooth teff batter at roughly 1:1.3 to 1:1.5 flour to water, let it ferment for three or four days until it is sour and bubbly, and cook it thin and hot under a lid on one side. Your first attempts teach you what your flour and pan want. Once you dial in the ratio and the ferment time for your kitchen, and start saving ersho from one batch to the next, you will make it without thinking. Once you have a stack of your own, pair it with the most popular traditional Ethiopian dishes and finish the meal properly with coffee.